Frequently Asked Questions
FIX: Relay Access Denied 554 5.7.1 Error in Outlook (Solved)
FIX: Relay Access Denied 554 5.7.1 Error in Outlook (Solved)
The "Server Error: Relay Access Denied 554 5.7.1" in Outlook occurs for two main reasons. The first reason is that your outgoing mail server (SMTP) doesn't allow to send emails without user authentication and the other reason is that your email address is marked at spam lists as a source of spam.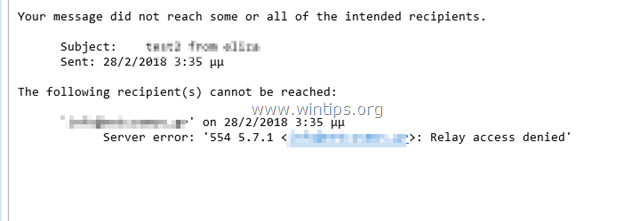
This tutorial contains instructions to solve the following error, after sending an email: "Your message did not reach some or all of the intended recipients. The following recipient(s) cannot be reached. Server error: 554 5.7.1 Relay Access Denied"
How to fix Relay Access Denied Error in Mail.
To determine the exactly reason of the Relay Access Denied 554 5.7.1 error and to resolve the problem follow the steps mentioned below.STEP 1. VERIFY MAIL SERVER SETTINGS AND ACCOUNT CREDENTIALS.
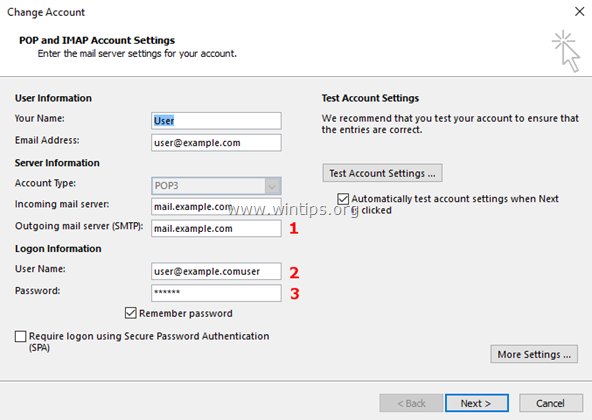
First of all, make sure that you have typed correctly the name of the Outgoing email server (SMTP), the User Name and your Password at your email application (Outlook, Thunderbird, etc.). ** Note: If the "Relay Access Denied" error has appeared without a reason (e.g. if you worked without problems until yesterday), then proceed and enable the "SMTP Authentication" (Step-2).
(Outlook Email Account Settings)
STEP 2. ENABLE SMTP USER AUTHENTICATION & SECURE CONNECTION.
To avoid spammers, many mail servers deny the emails to be relayed without first authenticating the user. So, proceed and enable the SMTP authentication and the secure connection at the Outgoing Mail Server settings.1. From the File menu, choose Account Settings *
* In Outlook 2007, 2003, go to Tools > Accounts.
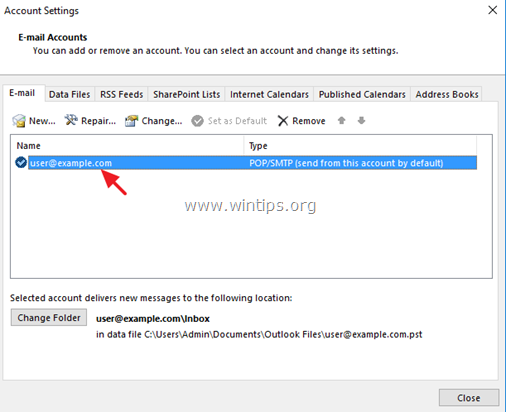
2. Double click at your email account where you experienced the "Relay Access Denied" error to launch its properties.
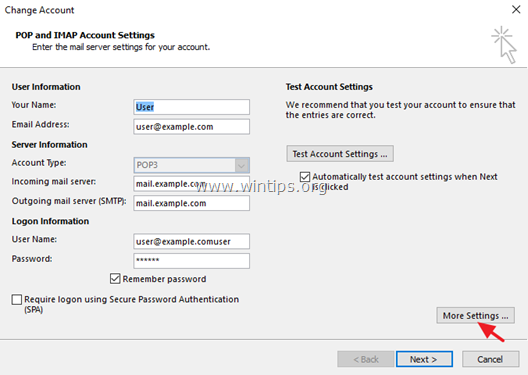
3. Click More Settings.
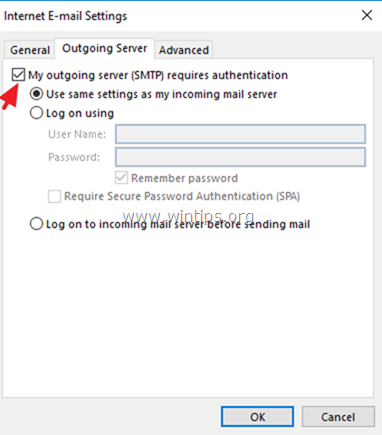
4. Select the Outgoing Server tab and check the "My outgoing server (SMTP) requires authentication" option.
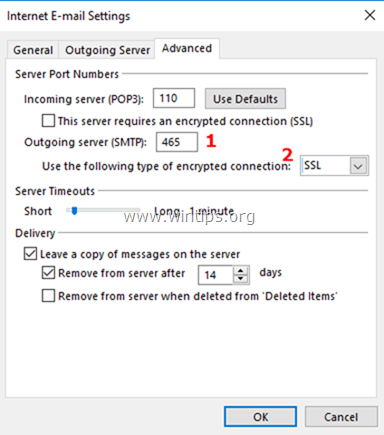
5. Then select the Advanced tab and specify the following settings for the Outgoing Mail Server.
- Outgoing server (SMPT) Port: 465
- Encryption type: SSL
6. Click OK and then Test Account Settings.
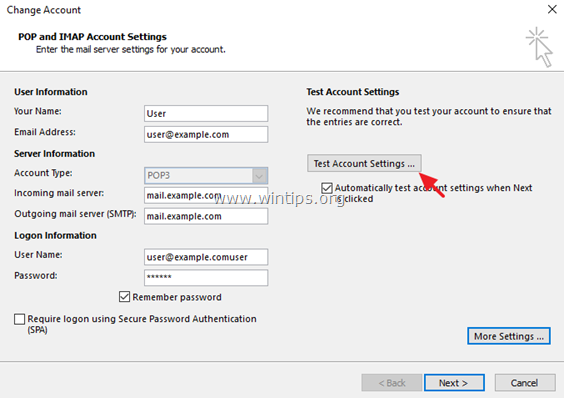
7. If the test is successful, click Next and close the Email Account Settings. Finally, try to send an email to see if the "Relay Access Denied" error is resolved. *
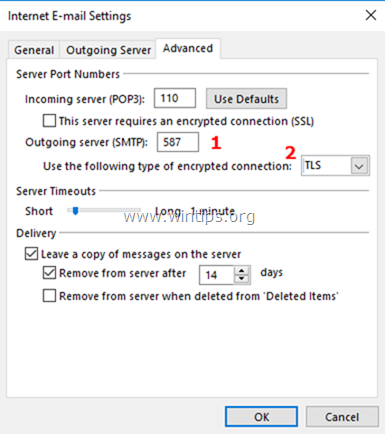
* Note: If the Test fails, or you continue receiving the "Relay Access Denied 554 5.7.1" error, then open the Advanced settings again, but this time specify the following settings. **
- Outgoing server (SMPT) Port: 587
- Encryption type: TLS or STARTTLS
STEP 3. VERIFY EMAIL SETTINGS WITH YOUR EMAIL PROVIDER & SCAN FOR VIRUSES.
If you still receive the "Relay Access Denied" error, after applying the above steps and settings, then speak with your email provider to verify that the account information (Username & Password) and the settings for the SMTP encrypted connection (Port & Encryption type) are correct.Additionally –but very important – check your computer and all other computers on your network for possible malware infections. To accomplish this task follow all the steps from this Quick Malware Scan and Removal Guide for PC’s.
STEP 4. CHECK IF YOUR MAIL SERVER OR YOUR DOMAIN IS LISTED AT SPAM (BLOCK) LISTS. *
* Notice: The final step to resolve the "Relay Access Denied" error mostly concerns company domains & Mail Server owners.A. If you own an email address, which is part of a company domain (e.g. user@company.com) and you receive the "Relay Access Denied" error:
1. Navigate to the following email blacklist checking sites:
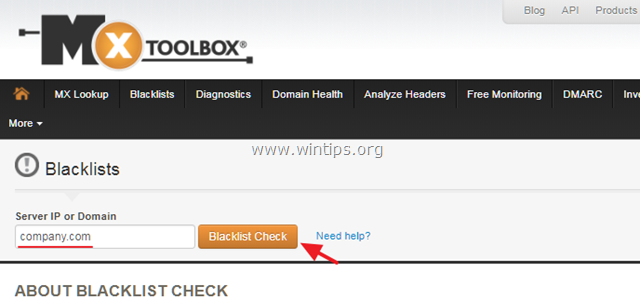
2. Type the company domain name (e.g. "company.com") or your full email address (e.g. user@company.com) at the search box and clickBlacklist Check.
B. If you 're the owner of the Outgoing mail server and your end users receive the "Relay Access Denied" error, check that your mail server is not Blacklisted. To do that:
1. Navigate to the following email blacklist checking sites:
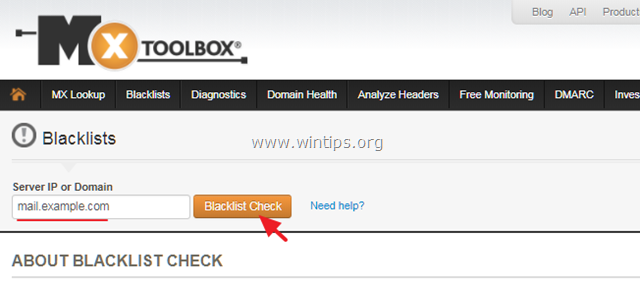
2. At the search box, type the name of the Outgoing Mail Server (e.g. "mail.example.com") and click Blacklist Check.
Last updated 05/12/2023 3:45 am
Please Wait!
Please wait... it will take a second!