Frequently Asked Questions
Installing an SSL certificate on our server, using cPanel
When purchasing a ssl certificate from www.namecheap.com and after the certificate has been activated and issued to you by the Certificate Authority(www.namecheap.com), you can proceed with deploying the certificate in your cPanel.
Follow the steps below:
Retro theme
- Log into your cPanel account
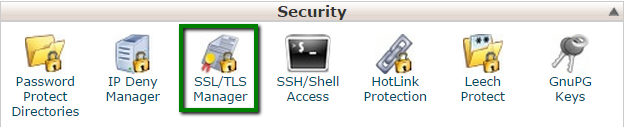
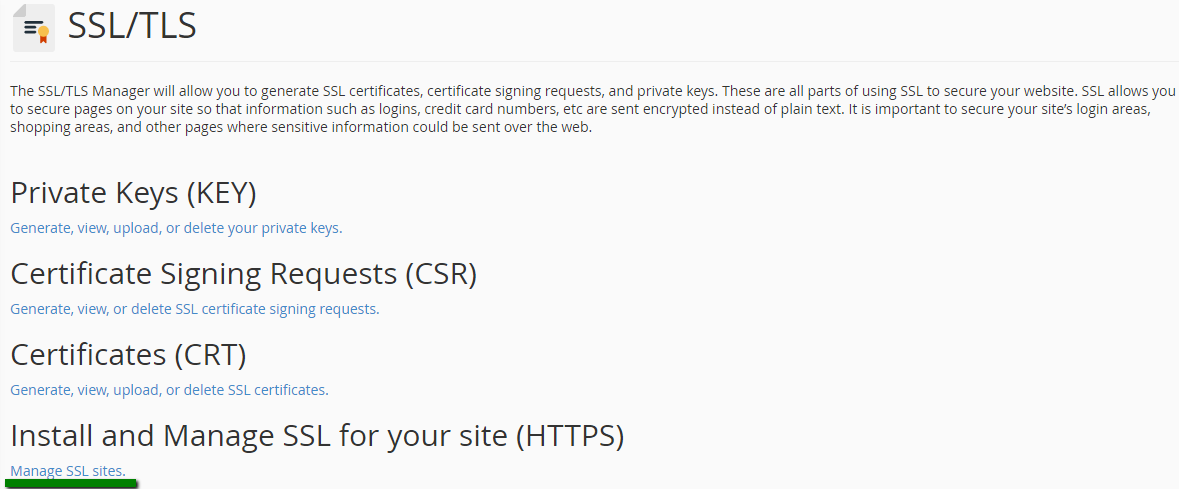
- Locate and click on SSL/TLS Manager in the Security section:
- Click on Manage SSL Sites under the Install and Manage SSL for your website (HTTPS) menu:
Note: Some hosting providers do not have the option Manage SSL Sites in their cPanel (ex.: Hostgator, Godaddy, etc.). In this case it might be necessary to contact the hosting provider directly for performing the installation process or locating the exact installation guide for third-party certificates on their site.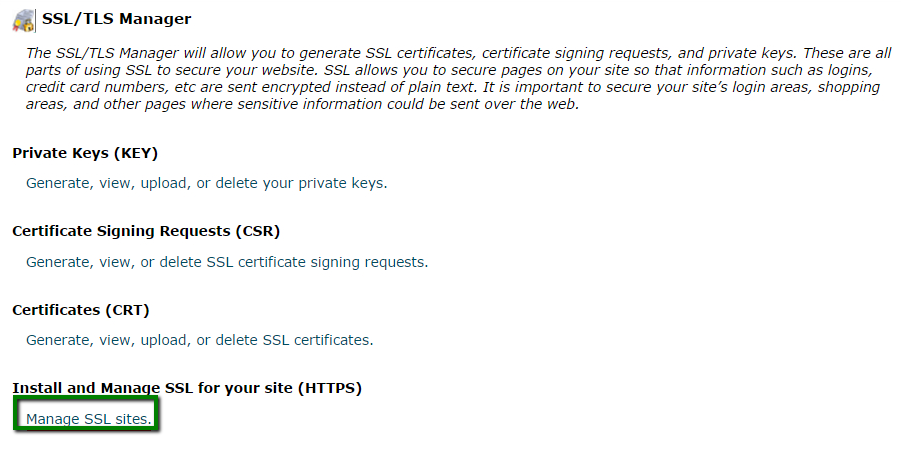
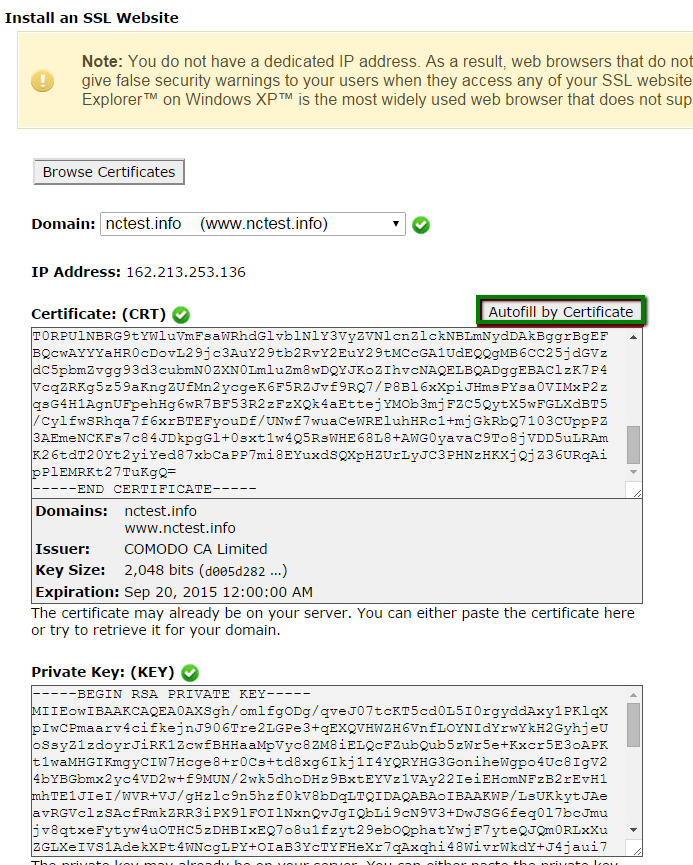
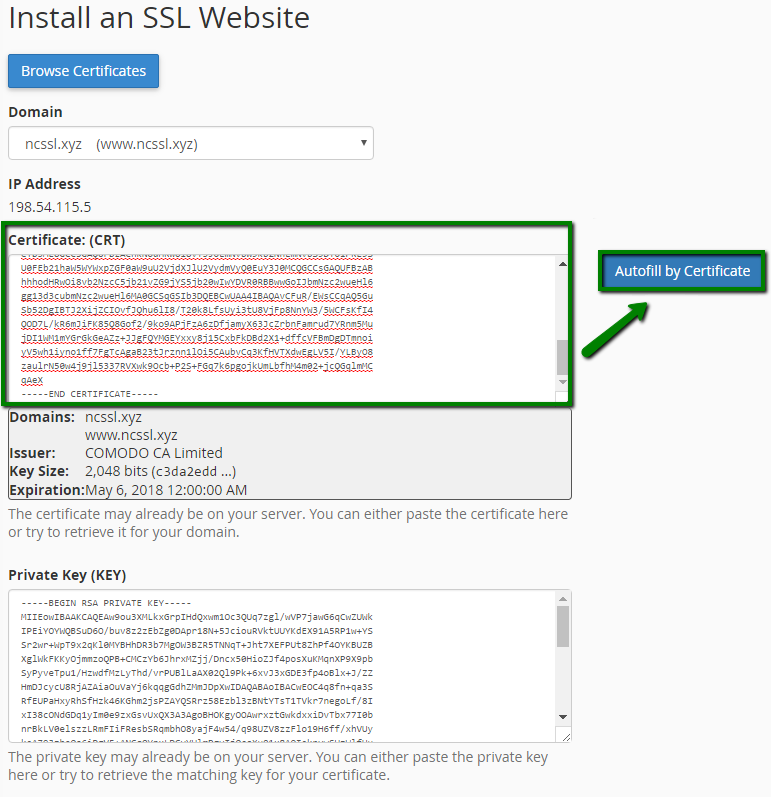
Note: Some hosting providers do not have the option Manage SSL Sites in their cPanel (ex.: Hostgator (Our VPS service), Godaddy, etc.). In this case it might be necessary to contact the hosting provider directly for performing the installation process or locating the exact installation guide for third-party certificates on their site. - Copy the certificate code you received from the Certificate Authority including -----BEGIN CERTIFICATE----- and -----END CERTIFICATE----- and paste it into the Certificate: (CRT) field on the next page. The certificate files can be opened with the help of a text editor (e.g., Notepad for Windows or Textedit for macOS) on your computer.
Note: The certificate code can be found in the *yourdomain*.crt file which is usually sent to you in the email from the Certificate Authority. Alternatively, it can be downloaded from your account directly. - Click on the Autofill by Certificate button, which appears next to the certificate entered, and the system will attempt to fetch the domain name and the private key. You may also choose the domain from the drop-down list and manually enter the certificate and private key into the corresponding boxes. If the system fails to fetch the private key, you can locate it in the Private Keys (KEY) section of the SSL/TLS Manager. Please remember to include Begin/End headers and footers for the certificate and the key. In case the private one is missing, please generate a new CSR code together with the private key and then reissue your SSL certificate.
- Copy and paste the chain of intermediate certificates (CA Bundle) into the box under Certificate Authority Bundle (CABUNDLE) if it is not filled in already.
If you want to use this certificate for Mail Services (Exim and Dovecot), check the Enable SNI for Mail Services box. In this case, you will be able to use your domain on which the SSL certificate has been installed as a hostname of the mail server configuring your mail clients to work via secured ports.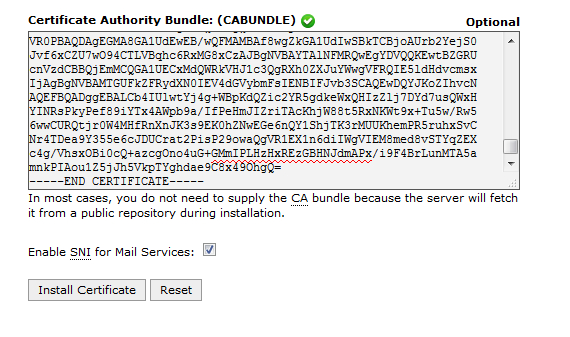
- Click on Install Certificate.
Congratulations! The certificate is now installed on the server for your site. The site should now be accessible via https://. You can check the installation using this tool
Basic theme
After the certificate has been activated and issued to you by the Certificate Authority, you can proceed with deploying the certificate in your cPanel. Follow the steps below:- Log into your cPanel account
- Locate and click on SSL/TLS Manager in the Security section:

- Click on Manage SSL Sites under the Install and Manage SSL for your website (HTTPS) menu:
- Copy the certificate code you received from the Certificate Authority including -----BEGIN CERTIFICATE----- and -----END CERTIFICATE----- and paste it into the Certificate: (CRT) field on the next page. The certificate files can be opened with the help of a text editor (e.g., Notepad for Windows or Textedit for macOS) on your computer.
Note: The certificate code can be found in the *yourdomain*.crt file which is usually sent to you in the email from the Certificate Authority. Alternatively, it can be downloaded from your account directly. - Click on the Autofill by Certificate button, which appears next to the certificate entered, and the system will attempt to fetch the domain name and the private key. You may also choose the domain from the drop-down list and manually enter the certificate and private key into the corresponding boxes. If the system fails to fetch the private key, you can locate it in the Private Keys (KEY) section of the SSL/TLS Manager. Please remember to include Begin/End headers and footers for the certificate and the key. In case the private one is missing, please generate a new CSR code together with the private key and then reissue your SSL certificate.
- Copy and paste the chain of intermediate certificates (CA Bundle) into the box under Certificate Authority Bundle (CABUNDLE) if it is not filled in already.
If you want to use this certificate for Mail Services (Exim and Dovecot), check the “Enable SNI for Mail Services” box. In this case, you will be able to use your domain on which the SSL certificate has been installed as a hostname of the mail server configuring your mail clients to work via secured ports.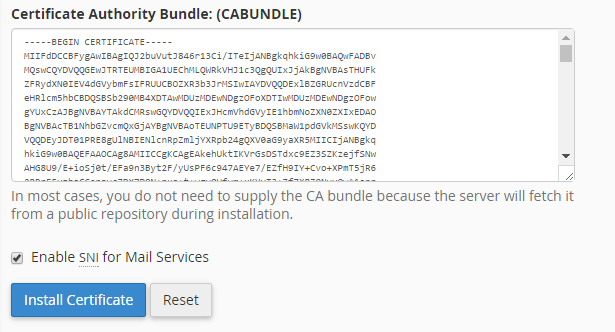
- Click on Install Certificate.
Last updated 10/29/2020 1:32 am
Please Wait!
Please wait... it will take a second!