Frequently Asked Questions
CentOS / RHEL 7 : How to install and configure telnet *
How to install Telnet On Centos 7
Linux Tutorial
5 Comments
2,088 Views
Telnet plays most important role to setup server remotely, it allows to check the configuration / status of services like Postfix & Dovecot, mysql, httpd and all the daemons which are installed in the machine. Lets read something about Telnet and its installation.
What is Telnet ?
Telnet is a remote server and client from which we can access our server remotely by command line called cli, this is the shadow of ” Terminal ” which works on ” TCP Port 23 “. Tenet allows our windows system to access Linux instance remotely by user or root login and allows us rights to modifying files, folders, install and remove applications on the target system. I am sharing procedure for installation and configuration telnet server, telnet client in CentOS 7 as well as Windows operating system.Install Telnet ( CentOS 7 )
1. Update your system first and install telnet by the following command# sudo yum update -y # sudo yum install telnet-server telnet
2. Add Telnet service into firewalld & Reload firewalld
# firewall-cmd --add-service=telnet --zone=public --permanent # firewall-cmd --reload
3. Now, enable Telnet at boot and start the service
# sudo systemctl start telnet.socket # sudo systemctl enable telnet.socket
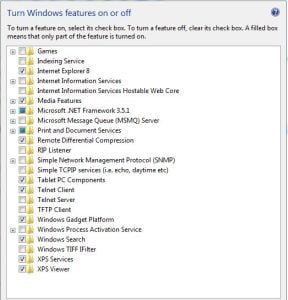
Install Telnet Client ( Windows )
- Click start => Control Panel
- Click programs
- Click programs and features
- Click windows feature on or off
- In this window, check telnet client and click OK
If we look telnet is an old style convention it gives a few imperfections. One of the most significant negative issue with telnet is its security highlights. Telnet don’t have any encryption support as it built. So telnet traffic can be effectively listened in during transmission. So don’t depend telnet on unreliable systems.
Connecting Telnet Server
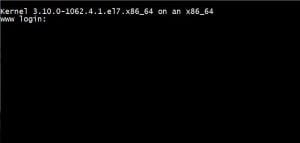
We can connect telnet server easily if above steps are done properly. To connect telnet server we need to put only IP address or host name of destination server, below is the syntax where I am using centos7 to connect the telnet server.Connecting telnet from a windows machine
Start=>RunTelnet 192.168.10.202 ( put your server-ip )
To access the server write the user name and password first and then enter the root credential to make changes in a server remotely from windows machine as you can see telnet screen in below example
Video Tutorial
By default telnet port TCP 23 is already added in the firewall ( CentOS 7 ) so there is no need to open port from firewall. If you are Fedora OS, open Telnet port using ” firewall-cmd –permanent –add-port=23/tcp “. Telnet is very useful to check status of all the ports which we make allow in the firewall, we will see in the next upcoming tutorial about how telnet works. Hope you have understood about telnet, if you have any confusion regards the above then you can comment below or directly contact me via the contact page. Please comment if you have any queries.
Last updated 05/05/2023 2:30 am
Please Wait!
Please wait... it will take a second!